Realtek HD Audio Manager Windows 11
How to Update Realtek HD Audio Manager on Windows 11?
There are several ways to update your Realtek HD Audio drivers, including uninstalling the software and rebooting your computer. If you’re not able to uninstall the program, roll back to an older driver version. This article will show you how to do all three. Then, you’ll be able to install the latest version of the driver and have a smooth running computer once again. We’ll also cover the other options available. So, download the latest version of Realtek HD Audio Manager Windows 11.
Download Realtek HD Audio Manager Windows 11 (Here)
Uninstalling Realtek HD Audio Manager:
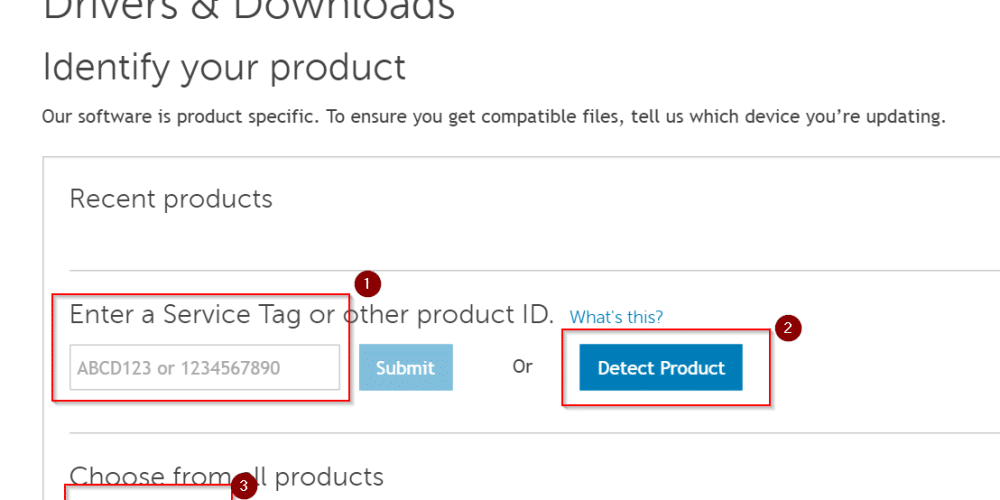
Before you can uninstall Realtek HD Audio Manager from your computer, you must first locate and download the latest version from the manufacturer’s website. Once you have done that, you should open Device Manager, which you can access through the Control Panel, start menu, and Settings menu. Click on the Realtek High Definition Audio driver and right-click to select the “Uninstall device”. Once the uninstallation process is complete, restart your computer.
To uninstall the Realtek High Definition Audio driver, go to Programs and Features and expand the Sound, Video, and Game Controller branch. Right-click on the Realtek HD Audio manager and choose Uninstall. Then, restart your PC. If the uninstallation process did not fix the problem, you should try downloading and installing the latest version of Realtek HD audio manager. The new version should fix the problem.
Restarting Windows:
When the Realtek HD audio service has crashed, you can attempt a system restore to a previous point. If you have audio drivers on your PC, this restore point should not be from the day you installed the audio drivers. Click the Next button to confirm. Windows will restore the system to the last time it had audio drivers and will then ask you to wait while it completes the process. After you restart your computer, you should have no problems with the Realtek audio driver.
You can also try reinstalling the Realtek HD audio driver from its official website. If this method doesn’t work, you can try restarting the Windows audio service. To do this, press the Windows key to open Task Manager. In the Services tab, select the Realtek audio service. Right-click on the service, then select “Restart.”
Rolling back to the previous version of the driver:
If you encounter the error “Realtek HD Audio Manager does not open”, you can try to roll back the driver. To do so, open the control panel and type “control panel” or “control” on your keyboard. In the Control Panel, select the Hardware and Sound category. In the Control Panel, double-click on the Realtek HD Audio manager. In the right-hand pane, click on the “Programs And Features” option. Then, right-click on the Realtek HD Audio Manager and choose “Uninstall.”
You can also roll back to a previous version of the Realtek HD audio manager driver on Windows 10. To do this, open the Device Manager, where you can find the “Roll Back Driver” option. This option lists the available drivers for different system versions. Select “Yes” when asked whether or not to roll back to an older version. Follow the on-screen instructions to complete the installation. Once the installation process is complete, you can install the old driver to get it back to its default settings.