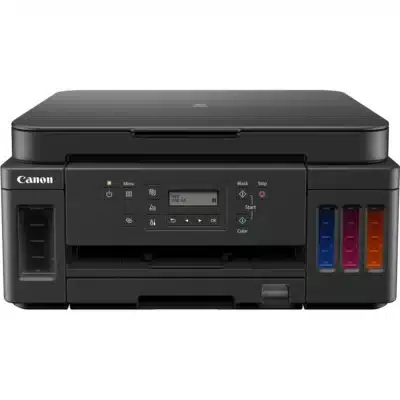
Canon G6020 Driver for Windows
About Canon G6020 Printer Connectivity:
Download Canon G6020 Driver (Here)
To connect the Canon G6020 printer to a Windows computer, you can follow these steps:
- Prepare the printer: Ensure that the printer is powered on and properly set up. Make sure it has paper loaded in the paper tray and ink tanks with sufficient ink.
- Connect the printer to the computer: Use a USB cable to connect the printer to your Windows computer. Plug one end of the USB cable into the printer’s USB port and the other end into an available USB port on your computer.
- Install the printer driver: If you haven’t already done so, download and install the printer driver by following the steps outlined in the previous response (“How to download the Canon G6020 driver?”). Make sure to complete the installation process before proceeding.
- Configure the printer on Windows:
a. Open the “Settings” app: Click on the “Start” menu, then click on the “Settings” gear icon.
b. Go to “Devices”: In the Windows Settings window, click on the “Devices” option.
c. Add a printer or scanner: In the Devices settings, click on the “Printers & scanners” tab in the left-hand menu. Then click on the “Add a printer or scanner” button.
d. Wait for Windows to detect the printer: Windows will start searching for printers connected to your computer. It may take a few moments for the Canon G6020 printer to appear on the list.
e. Select the Canon G6020 printer: Once your printer is detected, it should show up in the list under the “Printers & scanners” section. Click on the printer’s name to select it.
f. Complete the setup: Windows will guide you through the remaining steps to complete the printer setup. Follow the on-screen instructions, which may include confirming the printer’s name and settings.
g. Test the printer: After the setup is complete, you can print a test page or try printing a document to ensure that the printer is successfully connected to your Windows computer.
If you prefer to connect the Canon G6020 printer wirelessly to your Windows computer, you can refer to the printer’s user manual or the Canon support website for instructions on setting up a wireless connection. The process typically involves connecting the printer to your Wi-Fi network and installing the printer driver with the appropriate wireless settings.
How can I Download the latest version of Canon G6020 Driver?
To download the Canon G6020 printer driver, follow these steps:
- Visit the Canon Support website: Follow the provided URL here or go to the official Canon website (www.canon.com) and navigate to the “Support” or “Support & Drivers” section.
- Select your region: Choose your country or region to access the corresponding Canon support website.
- Find the product support page: Search for “G6020” or navigate to the product category for printers. Look for the specific model, Canon PIXMA G6020, and click on it to access its support page.
- Locate the Drivers & Downloads section: On the G6020 support page, you should find a section called “Drivers & Downloads” or a similar name. Click on it to proceed.
- Choose your operating system: Select the operating system (e.g., Windows, macOS, Linux) and version that you are using from the available options. Make sure to select the correct version for your computer.
- Download the driver: Look for the driver package specifically designed for the Canon G6020 printer and click on the “Download” button next to it. The driver package is usually a file with an extension like .exe (for Windows) or .dmg (for macOS).
- Accept the terms and conditions: Read and accept the terms and conditions or licensing agreement if prompted.
- Run the driver installer: Once the driver file is downloaded, locate it on your computer and double-click on it to run the installer. Follow the on-screen instructions to complete the installation process.
- Connect your printer: After the driver is installed, connect your Canon G6020 printer to your computer using a USB cable or set it up on your local network if it has Wi-Fi capabilities.
- Test the printer: Once the installation is complete, you can test the printer by printing a test page or performing a print job to ensure that the driver is functioning correctly.
Remember that the steps above are general guidelines, and the specific process may vary slightly depending on your operating system and the Canon website’s layout or updates. If you encounter any difficulties or have further questions, it’s recommended to consult the Canon support website or contact Canon customer support for assistance.
Installation Process of the Driver:
To install the Canon G6020 driver on a Windows computer, follow these steps:
- Download the driver: Go to the Canon website and download the correct driver for your Windows operating system.
- Run the installer: Once the driver download is complete, locate the downloaded driver file and double-click it to run the installer.
- Accept the license agreement: Read the license agreement carefully and click “Yes” or “Agree” to accept the terms and conditions.
- Connect the printer: Connect your Canon G6020 printer to your computer using a USB cable or set it up wirelessly according to the printer’s user manual. Make sure the printer is turned on and in a ready state.
- Follow the prompts: Follow the on-screen prompts to complete the installation process. The prompts will vary depending on the driver version you downloaded, but generally, you’ll need to select the language, printer connection type, and printer model.
- Test the printer: Once the driver installation is complete, you can test the printer by printing a test page or any other document.
If you encounter any issues during the installation process, refer to the documentation provided by Canon or contact their customer support for assistance.